Monitoring WebLogic and Java
Dec 06, 2016Dan Iverson
Lately, I have had interest in monitoring WebLogic’s performance. Since Weblogic is built on Java, there are some standard tools we can use to look into the Java Virutal Machine (JVM). We’ll cover two of those tools in this post: JConsole and VisualVM. Both JConsole and VisualVM are included in the Java Development Kit so they are already on your server. These tools will give you information about the JVM used to run WebLogic and can help you tune you web servers.
JMX
To get monitoring data out of WebLogic’s JVM, we need to enable JMX. Java Management Extensions (JMX) is a monitoring technology built into Java. Applications that run on Java can build instrumentation into the application to provide performance data about the application. Even without additional data, the JVM will provide CPU, Memory, Thread and other stats about the heap.
To enable JMX for WebLogic, we’ll update the setEnv.cmd or setEnv.sh file. At the end of the JAVA_OPTIONS line, add these flags:
-Dcom.sun.management.jmxremote -Dcom.sun.management.jmxremote.port=8888 -Dcom.sun.management.jmxremote.ssl=false -Dcom.sun.management.jmxremote.authenticate=false
There are 4 flags we pass to Java when the JVM is started:
- Enabling JMX Remote connections
- JMX Remote Port
- Requiring SSL Connections
- Authentication for JMX
For testing, I’ve turned off SSL and Authentication, but if you are enabling JMX across all your servers I recommend you turn both options on. For the JMX Port, pick a port value that is unique for each instance of the JVM. Each WebLogic and App Server instance will have its own JVM. For more information on configuring JMX, this is a link to the official documentation.
If your are on Windows and updated the setEnv.cmd file, you will want to re-install the Service that starts the PIA domain. The JAVA_OPTIONS parameters are stored in the registry when you create the service. If you update setEnv.cmd, you need to recreate the service (or manually update the registry).
Now that JMX is enabled on our domains, let’s look at a few tools to help us monitor our JVMs.
JConsole
JConsole is a utility included with the JDK download. Under JAVA_HOME\bin you’ll find jconsole.exe To start, we’ll run JConsole from our web server where we enabled JXM (instead of our desktop). Open JConsole and it will ask you to connect to a JMX Process. You have two options: Local Process and Remote Process. We’ll use the remote process option and use these values to connect to our web server: localhost:8888. We don’t need a username or password since we passed the flag jmxremote.authentication=false.
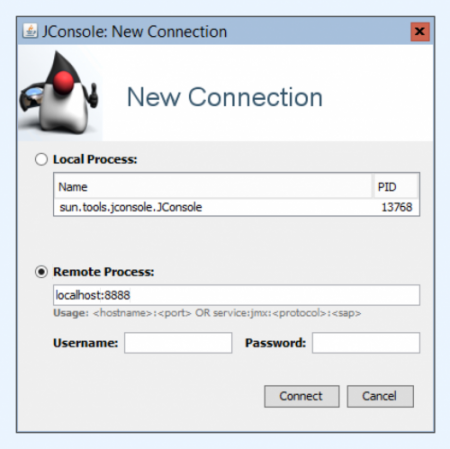
After connecting, you’ll get a message asking about your insecure connection. Click “Insecure” to continue. On the main page, we see 4 graphs related to the JVM.
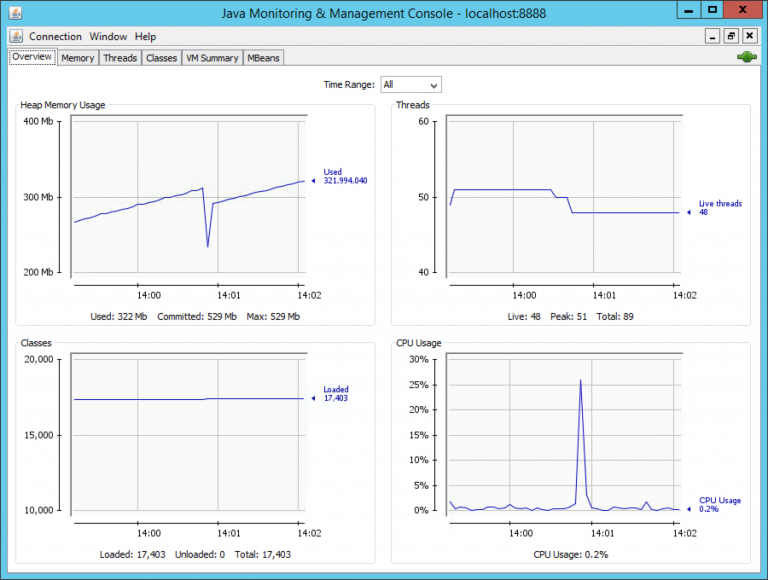
These graphs give you a good overview of the JVM status. The CPU graph will show you how much of the CPU that JVM is using, and the Threads graph gives a good indication of workload on the JVM. The best part of JMX is the Memory graph. Getting your JVM Heap sized correctly can make a big different in performance. The graph should follow a pattern when Garbage Collection runs.
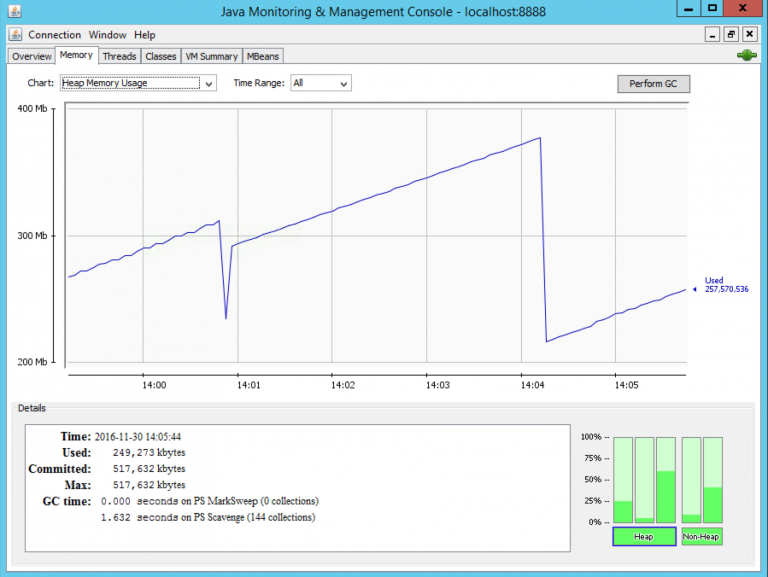
You don’t want Garbage Collection to run too often, or the usage too high after Garbage Collection. This graph helps with getting the right size for your web server. (You can find more tuning information here.)
VisualVM
VisualVM is another untility included with the JDK download and is also under JAVA_HOME\bin. We’ll start VisualVM on the server as well by running jvisualvm.exe --console new.
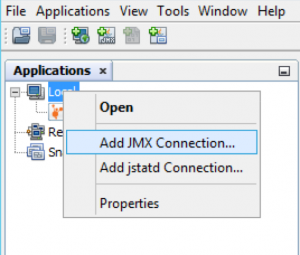
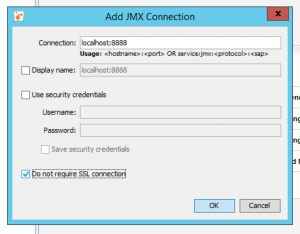
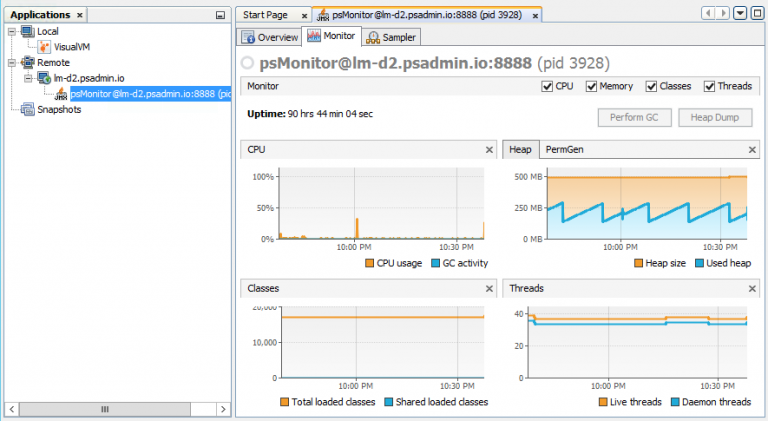
When VisualVM opens, we create a new connection by right-clicking on “Local” and selecting “Add JMX Connection”. Fill in the port number and select “Do not require SSL connection”.
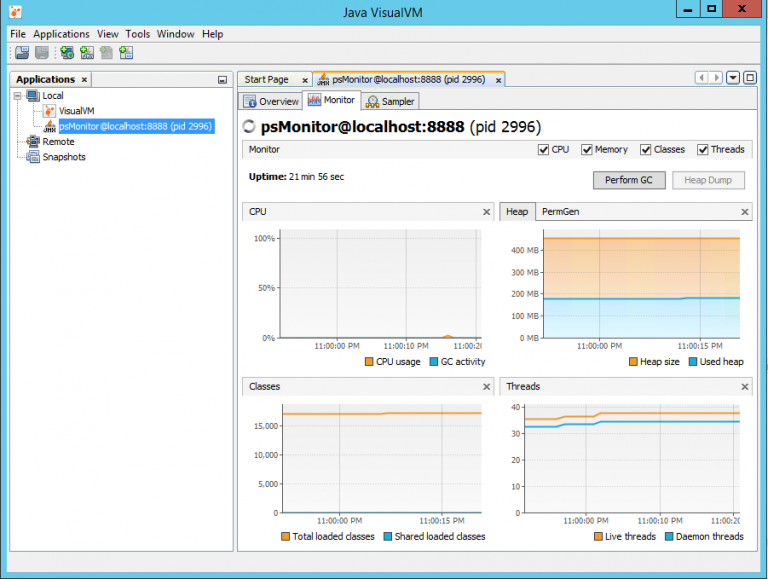
VisualVM show us similar data as JConsole, but I think it looks a nicer. Under the Monitor tab, you can also force the JVM to run a Garbage Collection. For the most part, these two applications are similar.
Remote JMX Connections
We have run both applications on the server to connect to JMX, but these applications are more useful if we can connect to the servers remotely. By default, JMX will only accept local connections. To enable remote connections to JMX, we have to pass this flag:
-Dcom.sun.management.jmxremote.local.only=false
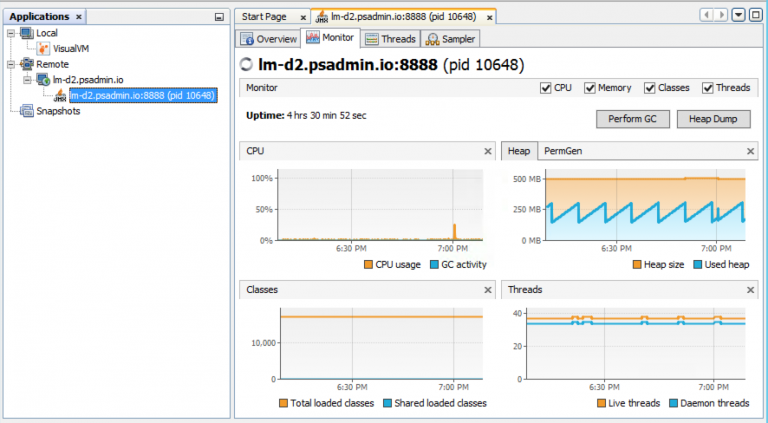
After you add that parameter to your setEnv.cmd JAVA_OPTIONS line, restart the web server. On a different computer or server, launch VisualVM or JConsole. Create a remote connection to JMX on the server. In the Connection box, enter the server name and port for the JMX instance.
JMX Authentication
Once you get the basic configuration in place, you want to enable authentication to connect to the JMX instance. The default JMX authentication is stored in the JDK folder. That will affect all domains using the JDK folder. Instead, we will use a JMX password file for each web server domain.
- Open the file
JAVA_HOME\jre\lib\management\jmxremote.access. - Add the line
psMonitor readonlyto the bottom of the file and save. This line adds a new user namedpsMonitorand a read-only account to any JMX instances using thisJAVA_HOME. - Copy the file
JAVA_HOME\jre\lib\management\jmxremote.password.templatetoPS_CFG_HOME\webserv\jmxremote.password. - Open the new
jmxremote.passwordfile. - Add the line
psMonitor test123to the bottom of the file and save. This line sets the password for thepsMonitoruser. To give each web server domain a different password, set a unique password in this file under eachPS_CFG_HOME. -
Open the
setEnv.cmdfile and add these parameters:-Dcom.sun.management.jmxremote.password.file=PS_CFG_HOME\webserv\jmxremote.password -Dcom.sun.management.jmxremote.authenticate=true -
Restart the web server for the new paramters to take affect.
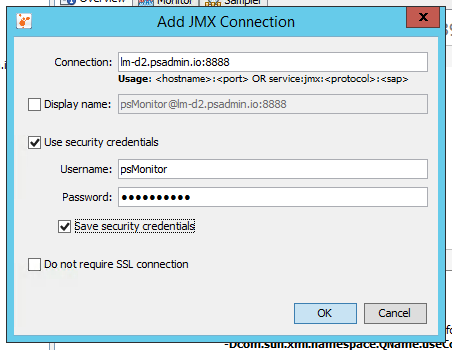
Now that we have a web server configured to run JMX with authentication, we will create another connection in VusualVM to use the username and password.
- Right-click on the remote server and select “Add JMX Connection”
- Enter the server name and port.
- Enter
psMonitorfor the Username andtest123for the Password. - Select “Do no require SSL connection”
- Click OK.
Note: This was originally posted by Dan Iverson and has been transferred from a previous platform. There may be missing comments, style issues, and possibly broken links. If you have questions or comments, please contact [email protected].

