Build a PeopleSoft Image – On Your Laptop with Vagabond
YouTube player

You can run PeopleSoft Images on your laptop using three tools that work seamlessly together: VirtualBox, Vagrant, and Vagabond.

  • VirtualBox is virtualization software to run a VM on your laptop (any Intel-based laptop, not Apple Silicon-based Macs)
  • Vagrant is a tool to interact with VirtualBox that can automate VM builds
  • Vagabond is an open source tool that delivers automation to build a PeopleSoft Image.

Download and install VirtualBox and Vagrant on your laptop.

Next, you will need to download Vagabond from GitHub. The preferred way to to download is via git (you can install Git but it’s optional). Without git, you can click on the latest Release and download the zip file.

cd ~/Downloads
# unzip ps-vagabond*.zip if downloading from the Releases
git clone https://github.com/psadmin-io/ps-vagabond.git
cd ps-vagabond

There are two configuration files we need to run Vagabond:

  • config.rb
  • psft_customizations.yaml

Vagabond delivers example versions of each of these files and we can copy the .example files.

cd config
copy-item ./psft_customizations.yaml.example psft_customizations.yaml
copy-item ./config.rb.example config.rb
cd ..

You only need to modify the psft_customizations.yaml file if you are building a Finance or Interaction Hub image. You need to modify the default user to be VP1 instead of PS.

The config.rb file you must modify to make Vagabond work. It needs two pieces of information: your My Oracle Support Credentials, and a Patch ID for the PeopleSoft Image.

MOS_USERNAME="dan@psadmin.io"
MOS_PASSWORD="password"

PATCH_ID="34775556"

Now you are ready to build the PeopleSoft Image.

vagrant up

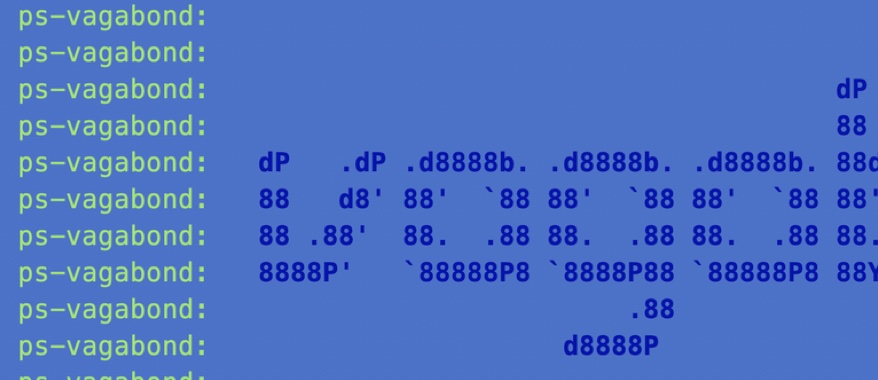
You will see output from Vagrant displaying the different tasks it handles setting up the VM. Vagrant will download a base Oracle Linux 8 VM, create a new VirtualBox VM, configure the networking, and start provisioning. Provisioning is the set of scripts that Vagabond provides to automate the download and building of PeopleSoft Images. Below is a (simplified) version of the output you will see as Vagabond runs.

Bringing machine 'ps-vagabond' up with 'virtualbox' provider...
==> ps-vagabond: Importing base box 'generic/oracle8'...
==> ps-vagabond: Setting the name of the VM: 34775556
==> ps-vagabond: Configuring and enabling network interfaces...
==> ps-vagabond: Mounting shared folders...
    ps-vagabond: /vagrant => /Users/dan/Downloads/ps-vagabond
    ps-vagabond: /media/sf_34775556 => /Users/dan/Downloads/ps-vagabond/dpks/download
==> ps-vagabond: Running provisioner: networking_setup (shell)...
    ps-vagabond:  ☆  INFO: 
    ps-vagabond:  ☆  INFO: 
    ps-vagabond:  ☆  INFO: ===> Add '192.168.56.34 psvagabond psvagabond.psadmin.local' to your hosts file
    ps-vagabond:  ☆  INFO: 
    ps-vagabond:  ☆  INFO: 
==> ps-vagabond: Running provisioner: storage (shell)...
==> ps-vagabond: Running provisioner: bootstrap-lnx (shell)...
    ps-vagabond: 
    ps-vagabond: 
    ps-vagabond:                                       dP                               dP 
    ps-vagabond:                                       88                               88 
    ps-vagabond:   dP   .dP .d8888b. .d8888b. .d8888b. 88d888b. .d8888b. 88d888b. .d888b88 
    ps-vagabond:   88   d8' 88'  `88 88'  `88 88'  `88 88'  `88 88'  `88 88'  `88 88'  `88 
    ps-vagabond:   88 .88'  88.  .88 88.  .88 88.  .88 88.  .88 88.  .88 88    88 88.  .88 
    ps-vagabond:   8888P'   `88888P8 `8888P88 `88888P8 88Y8888' `88888P' dP    dP `88888P8 
    ps-vagabond:                          .88 
    ps-vagabond:                      d8888P 
    ps-vagabond: 
    ps-vagabond: 
    ps-vagabond:  ☆  INFO: Updating installed packages
    ps-vagabond:  ☆  INFO: Installing additional packages
    ps-vagabond:  ☆  INFO: Disable SELinux for PeopleSoft Images
    ps-vagabond:  ☆  INFO: Downloading patch files
    ps-vagabond:  ☆  INFO: Unpacking DPK setup scripts
    ps-vagabond:  ☆  INFO: Executing Pre setup script
    ps-vagabond:  ☆  INFO: Executing DPK setup script
    ps-vagabond:  ☆  INFO: Install psadmin_plus
    ps-vagabond:  ☆  INFO: Open Firewall Ports
    ps-vagabond: 
    ps-vagabond:  TASK                         DURATION
    ps-vagabond: ========================================
    ps-vagabond:  install_psadmin_plus         00:00:01
    ps-vagabond:  download_patch_files         00:13:36
    ps-vagabond:  unpack_setup_scripts         00:00:41
    ps-vagabond:  execute_pre_setup            00:00:00
    ps-vagabond:  install_additional_packages  00:01:29
    ps-vagabond:  update_packages              00:03:40
    ps-vagabond:  open_firewall_ports          00:00:02
    ps-vagabond:  execute_psft_dpk_setup       01:00:56
    ps-vagabond:  generate_response_file       00:00:00
    ps-vagabond:  disable_selinux              00:00:00
    ps-vagabond: ========================================
    ps-vagabond:  TOTAL TIME:                  01:20:25
    ps-vagabond: 
==> ps-vagabond: Running provisioner: cache-lnx (shell)...
    ps-vagabond:  ☆  INFO: Copying Manifests
    ps-vagabond:  ☆  INFO: Fix DPK App Engine Bug
    ps-vagabond:  ☆  INFO: Pre-load Application Cache
    ps-vagabond: 
    ps-vagabond:  TASK                         DURATION
    ps-vagabond: ========================================
    ps-vagabond:  fix_dpk_bug                  00:00:02
    ps-vagabond:  load_cache                   00:21:03
    ps-vagabond:  download_manifests           00:00:00
    ps-vagabond: ========================================
    ps-vagabond:  TOTAL TIME:                  00:21:05
    ps-vagabond: 

To access the PeopleSoft Image from a browser, you first need to add a hosts entry. In the output, you’ll see the text you need to add to the file.

For Windows, the file is located at C:\Windows\System32\drivers\etc\hosts, and Mac/Linux the file is /etc/hosts. From our example above, you would add this line to the file:

192.168.56.34 psvagabond psvagabond.psadmin.local

Then you can access the PeopleSoft Image at http://psvagabond.psadmin.local:8000/ps/signon.html

A few tips for working with Vagrant VMs. It’s very easy to take a snapshot as a backup of the VM. I always take a snapshot right after building the image.

vagrant snapshot save build

If you need to stop or start the VM, use these commands:

vagrant halt        # stop the VM
vagrant up          # start the VM
vagrant suspend     # pause the VM
vagrant resume      # unpause the VM

You can also SSH into the VM if you want to access the server:

vagrant ssh

#294 – That is fine

The PeopleSoft Administrator Podcast hosted by Dan Iverson and Kyle Benson

This week on the podcast, Dan gives an update on his Hyper-V work with Vagabond and shares a funny log line he found, and Kyle shares some thoughts on making Hiera and eYAML more secure for PeopleTools DPK.

Show Notes

#293 – Hyper-V

The PeopleSoft Administrator Podcast hosted by Dan Iverson and Kyle Benson

This week on the podcast, Dan talks about his PeopleTools 8.59 testing experience, testing Hyper-V for PeopleSoft Images, and Kyle and Dan discuss compare reports from the Update Manager.

Show Notes

Speed up PeopleSoft Images

One complaint I have about using PeopleSoft Images is that logging in and opening pages is very slow. Behind the scenes, the application server is caching objects as you request them. The initial cache load can take time and that leads to very slow page loads. To eliminate the cache loading and slow performance, we can run the LOADCACHE process to pre-load all of the application cache.

We will solve this problem using a short Puppet manifest that runs after the DPK is finsihed. This lets the delivered DPK build the system, then we follow along and make the performance improvements.

Before we look at the Puppet code, lets look at the LOADCACHE process and configuration.

LOADCACHE

The LOADCACHE process is an App Engine that will pre-build all of the cache files an application server needs. You run the process from the page “PeopleTools > Utilities > Administration > Load App Server Cache”. Depending on the size of your database, this may take a long time. In my HR Image 32 VM, the process only took 10 minutes. In a large Finance production system, the process ran for 3 hours.

The LOADCACHE process will build the cache files in a directory named CACHE/STAGE/stage. The contents of the stage directory can be copied (or symlinked) to your application server domain. (There is an Output Destination box on the run control page, but it does not control the output location.) The pre-built cache files must be stored under a CACHE/STAGE directory. This directory can live anywhere, but it is easiest to store the cache files under the application server domain.

Last, we need to tell our application server to use the shared cache files instead of per-process cache files. In psappsrv.cfg, set ServerCacheMode=1 and reconfigure the application server.

DPK

The steps we want to automate are this:

  1. Run the LOADCACHE app engine
  2. Create a symlink from app domain to pre-built cache
  3. Change ServerCacheMode in psappsrv.cfg
  4. Reconfigure and start the app server domain

First, the DPK is built to handle multiple app server domains on a box, so let’s wrap our Puppet code in an appropriate loop. Create the file manifests/loadcache.pp:

#loadcache.pp
$appserver_domain_list = hiera('appserver_domain_list')
$appserver_domain_list.each | $domain_name, $app_domain_info | {


}

This code looks up our app server domains in Hiera and will iterate over each domain.

To run an app engine via the DPK, we could use the exec resource and create a command to run. There is a pt_psae custom Puppet Type that the DPK delivers and we can use this to run App Engines. BUT, there is a bug in pt_psae! It is hard-coded to only run PTEM_CONFIG (the ACM App Engine). We can fix that pretty easily. It just so happens that we the pt_psae type takes a program_id parameter and we can use that instead of the hard-coded value.

In the file production/modules/pt_config/lib/puppet/provider/psae.rb, we change the line

ae_program_name="PTEM_CONFIG"

to

ae_program_name=resource[:program_id]

To make this easier, let’s wrap this bug fix into a separate Puppet manifest so we can fix the bug on the fly. Create the file manifests/fixdpkbug.pp

#fixdpkbug.pp
$dpk_location = hiera('dpk_location')

exec { 'fix-dpk-bug':
  command => "sed -i 's/ae_program_name=\"PTEM_CONFIG\"/ae_program_name=resource[:program_id]/' ${dpk_location}/puppet/production/modules/pt_config/lib/puppet/provider/psae.rb",
  path  => '/usr/bin',
}

Back in our loadcache.pp file, we will use the pt_psae type to call the LOADCACHE program. The type requires the database connection credentials that live in the hash db_settings:. We need to convert the hash into an array of key=value pairs first. Then we can populate the parameters for pt_psae.

#loadcache.pp
$ps_home_dir = hiera('ps_home_location')

$appserver_domain_list = hiera('appserver_domain_list')
$appserver_domain_list.each | $domain_name, $app_domain_info | {

  $db_settings = $app_domain_info['db_settings']
  $db_settings_array  = join_keys_to_values($db_settings, '=')
  $ps_cfg_home_dir = $app_domain_info['ps_cfg_home_dir']

  pt_psae {"LOADCACHE-${domain_name}":
    db_settings => $db_settings_array,
    run_control_id => 'BUILD',
    program_id => 'LOADCACHE',
    os_user =>  'psadm2',
    logoutput => 'true',
    ps_home_dir => $ps_home_dir,
  }

}

Next, we need to create the symlink in our app server domain to the location where our CACHE files are created. If you run LOADCACHE through the process scheduler, the files will be built under the PS_FILEDIR specified for the scheduler. Normally, this is stored under the process scheduler domain folder. Since we are running the process through the Puppet Type (aka, command line), it will use the psadm2 user’s PS_FILEDIR location which happens to be /home/psadm2/PS_CACHE.

To create the symlink, we can use the file resource built into Puppet.

#loadcache.pp
$ps_home_dir = hiera('ps_home_location')

$appserver_domain_list = hiera('appserver_domain_list')
$appserver_domain_list.each | $domain_name, $app_domain_info | {

  $db_settings = $app_domain_info['db_settings']
  $db_settings_array  = join_keys_to_values($db_settings, '=')
  $ps_cfg_home_dir = $app_domain_info['ps_cfg_home_dir']

  pt_psae {"LOADCACHE-${domain_name}":
    db_settings => $db_settings_array,
    run_control_id => 'BUILD',
    program_id => 'LOADCACHE',
    os_user =>  'psadm2',
    logoutput => 'true',
    ps_home_dir => $ps_home_dir,
  }
  -> file {"${ps_cfg_home_dir}/appserv/${domain_name}/CACHE/SHARE":
    ensure  => link,
    target  => "/home/psadm2/PS_CACHE/CACHE/STAGE/stage"
  }

}

Notice that we use the -> resource chain between pt_psae and file. This tells puppet that the app engine must run first before we create the symlink (so we know the folder exists).

Next, let’s update psappsrv.cfg to set the Server Cache Mode. For that, we will use an exec resource running the sed command. You could use the file_line resource as well. The file_line method would offer better multi-platform support, but the sed command is really easy to use.

#loadcache.pp
$ps_home_dir = hiera('ps_home_location')

$appserver_domain_list = hiera('appserver_domain_list')
$appserver_domain_list.each | $domain_name, $app_domain_info | {

  $db_settings = $app_domain_info['db_settings']
  $db_settings_array  = join_keys_to_values($db_settings, '=')
  $ps_cfg_home_dir = $app_domain_info['ps_cfg_home_dir']

  pt_psae {"LOADCACHE-${domain_name}":
    db_settings => $db_settings_array,
    run_control_id => 'BUILD',
    program_id => 'LOADCACHE',
    os_user =>  'psadm2',
    logoutput => 'true',
    ps_home_dir => $ps_home_dir,
  }
  -> file {"${ps_cfg_home_dir}/appserv/${domain_name}/CACHE/SHARE":
    ensure  => link,
    target  => "/home/psadm2/PS_CACHE/CACHE/STAGE/stage"
  }
  -> exec { "Set-Cache-Mode-${domain_name}": 
    command => "sed -i 's/^\;ServerCacheMode=0/ServerCacheMode=1/' ${ps_cfg_home_dir}/appserv/${domain_name}/psappsrv.cfg",
    path  => '/usr/bin',
  }

}

Last, we need to reconfigure the domain. I prefer using psadmin plus to handle domain restarts because it can bundle multiple actions into a single command. We can call psadmin plus from Puppet to do our reconfiguration.

#loadcache.pp
$ps_home_dir = hiera('ps_home_location')

$gem_home = '/opt/puppetlabs/puppet/bin'
exec { 'install-psadmin_plus':
  command => "${gem_home}/gem install psadmin_plus",
}

$appserver_domain_list = hiera('appserver_domain_list')
$appserver_domain_list.each | $domain_name, $app_domain_info | {

  $db_settings = $app_domain_info['db_settings']
  $db_settings_array  = join_keys_to_values($db_settings, '=')
  $ps_cfg_home_dir = $app_domain_info['ps_cfg_home_dir']

  pt_psae {"LOADCACHE-${domain_name}":
    db_settings => $db_settings_array,
    run_control_id => 'BUILD',
    program_id => 'LOADCACHE',
    os_user =>  'psadm2',
    logoutput => 'true',
    ps_home_dir => $ps_home_dir,
  }
  -> file {"${ps_cfg_home_dir}/appserv/${domain_name}/CACHE/SHARE":
    ensure  => link,
    target  => "/home/psadm2/PS_CACHE/CACHE/STAGE/stage"
  }
  -> exec { "Set-Cache-Mode-${domain_name}": 
    command => "sed -i 's/^\;ServerCacheMode=0/ServerCacheMode=1/' ${ps_cfg_home_dir}/appserv/${domain_name}/psappsrv.cfg",
    path  => '/usr/bin',
  }
  -> exec { "Bounce ${domain_name} App Domain":
    command => "${gem_home}/psa bounce app ${domain_name}",
    require => Exec['install-psadmin_plus'],
  }
}

Using the exec resource, we can install psadmin plus using the gem utility. Inside our domain loop we can bounce the app server after we build our cache and reconfigure the domain.

The bounce action for psadmin plus will stop the domain, clear cache, flush the IPC resources, reconfigure the domain, then start the domain from a single command.

Running loadcache.pp

We are ready to test our new manifest. We actually have two manifests to test:

  • loadcache.pp
  • fixdpkbug.pp

We need to run the fixdpkbug.pp manifest first. Since that manifest changes a line of the underlying Puppet provider code, we have to run it before we compile the Puppet catalog for our loadcache.pp run. Then, we will run the loadcache.pp manifest.

$ DPK_HOME="/opt/oracle/psft/dpk/puppet"
$ cd $DPK_HOME/production
$ sudo /opt/puppetlabs/puppet/bin/puppet apply manifests/fixdpkbug.pp --confdir $DPK_HOME
Notice: Compiled catalog for psvagabond in environment production in 0.09 seconds
Notice: /Stage[main]/Main/Exec[fix-dpk-bug]/returns: executed successfully
Notice: Applied catalog in 1.91 seconds
$ sudo /opt/puppetlabs/puppet/bin/puppet apply manifests/loadcache.pp --confdir $DPK_HOME
Notice: Compiled catalog for psvagabond in environment production in 0.15 seconds

Notice: /Stage[main]/Main/Exec[install-psadmin_plus]/returns: executed successfully
Notice: /Stage[main]/Main/Pt_psae[LOADCACHE-psftdb]/returns: PeopleTools 8.57.08 - Application Engine
Notice: /Stage[main]/Main/Pt_psae[LOADCACHE-psftdb]/returns: Copyright (c) 1988-2019 Oracle and/or its affiliates.
Notice: /Stage[main]/Main/Pt_psae[LOADCACHE-psftdb]/returns: All Rights Reserved
Notice: /Stage[main]/Main/Pt_psae[LOADCACHE-psftdb]/returns:
Notice: /Stage[main]/Main/Pt_psae[LOADCACHE-psftdb]/returns: Application Engine program LOADCACHE ended normally
Notice: /Stage[main]/Main/Pt_psae[LOADCACHE-psftdb]/returns: executed successfully
Notice: /Stage[main]/Main/Exec[Set-Cache-Mode-psftdb]/returns: executed successfully
Notice: /Stage[main]/Main/Exec[Bounce psftdb App Domain]/returns: executed successfully
Notice: Applied catalog in 594.46 seconds

To verify that your application servers are using the shared cache, open your APPSRV_mmdd.LOG file and look for these lines:

Cache Directory being used: /home/psadm2/psft/pt/8.57/appserv/psftdb/CACHE/SHARE/

When you log into your PeopleSoft Image, all of the pages will load faster than before.

Vagabond and Automated Builds

This change as been added to the ps-vagabond project. If you build your PeopleSoft Images with Vagabond, you can pull down the lastest changes in the master branch. If you want to see how to integrate these manifests into your PeopleSoft Image builds, you can look at this provisioning script.

The two files are shared as Gists in Github, you can freely use them:

UPDATE: I created an Idea for this on the PeopleSoft Idea Space. Go vote for this if you want to see this included in future PeopleSoft Images.