
There are times when troubleshooting you want to see what data was transmitted between two systems. When working with HTTP calls with Elasticsearch or Integration Broker targets, it can be helpful to see the data that was in the HTTP transaction. Seeing the data can often help resolve issues. Using MITMProxy, we can inspect HTTP traffic between two systems. In this post, I’ll show you how to use MITMProxy between PeopleSoft and Elasticsearch, and with the PeopleSoft Integration Broker.
Installation
You can download the MITMProxy binaries right from their website https://mitmproxy.org, or you can install from a package manager.
Powershell
choco install mitmproxy -y
Bash
python3 -m pip install mitmproxy
Reverse Proxy Mode
The first example we will walk through using a Reverse Proxy to inspect callback requests from Elasticsearch to PeopleSoft. The callback process is where Elasticsearch asks PeopleSoft what security a user has so that it can filter out results the user shouldn’t see.
First, we need to start up MITMProxy. To make it easier to view our HTTP transactions, we use the mitmweb executable. mitmweb provides a simple GUI for viewing each HTTP request and response that is captured.
To enable Reverse Proxy mode, we pass in the the mode and our target endpoint. For the Elasticsearch callback, that would be our Integration Broker web server.
Powershell
cd 'C:\Program Files\mitmproxy\bin'
.\mitmweb --mode reverse:http://ib.psadmin.io:8000
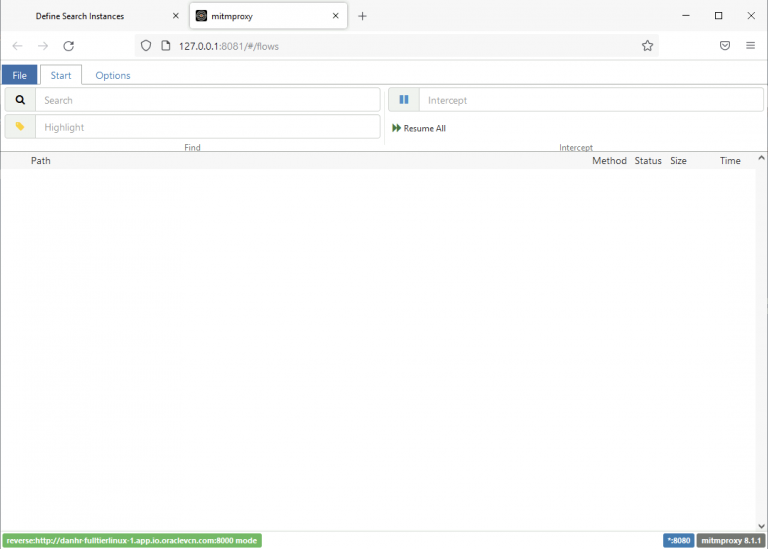
When MITM starts, a UI available at http://localhost:8081. You can open that URL in a browser and see an empty screen waiting for transactions.
Updating the Callback URL
In our case, we are going to inspect the call back from Elasticsearch to PeopleSoft. To do that we open the Search Instance page and update our Callback URL to point to MITMProxy.
Callback URL: http://mitmproxyserver.psadmin.io:8080/PSIGW/RESTListeningConnector/PSFT_HR
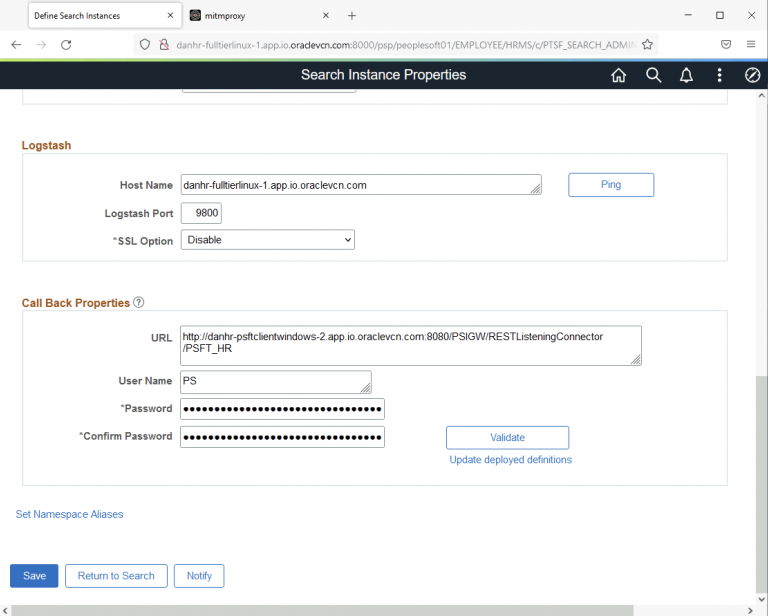
This URL is stored inside the metadata for each index. After you update the Callback URL and save, you must click the “Update Deployed Definitions” button. This will send the new Callback URL to Elasticsearch.
Inspecting Callback Traffic
Next, execute a search in PeopleSoft. I’ll search for a page using the Navigation searche. As soon as we have results in the search bar, you can look at your MITMProxy UI and see that it captured traffic.
The PeopleSoft plugins for Elasticsearch caches security attributes for 2 hours to help with performance. If you don’t see a callback transaction, try executing a search on a different index to get a callback transaction.
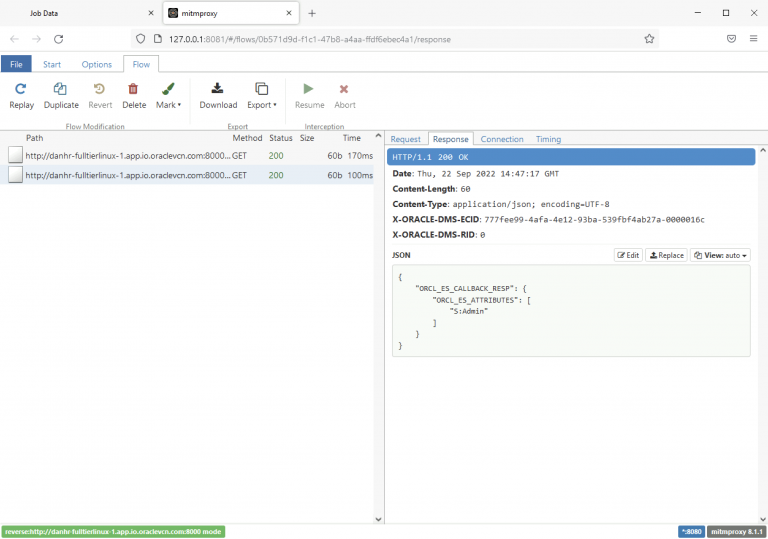
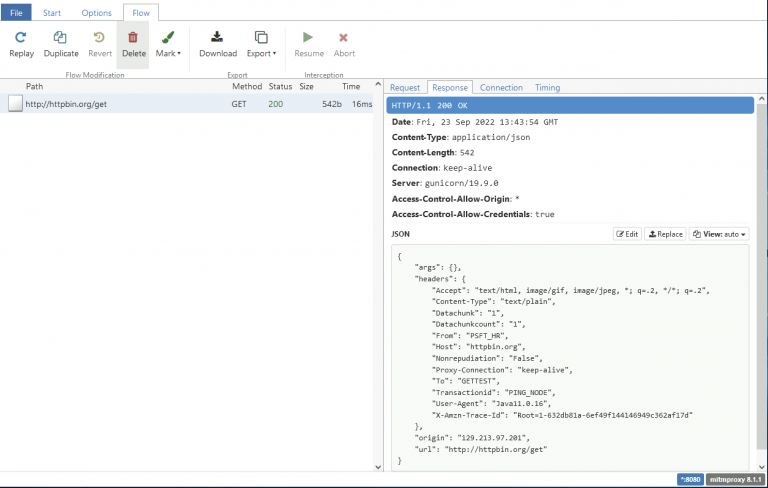
In MITMProxy, open the transaction and click on the “Response” tab. There you will see the JSON that PeopleSoft returned to Elasticsearch. This infomation is used to pair down the search results so that users only see the data they are allowed to view.
{
    "ORCL_ES_CALLBACK_RESP": {
        "ORCL_ES_ATTRIBUTES": [
            "S:Admin"
        ]
    }
}
Transparent Proxy Mode
In the example above, we ran MITMProxy in a reverse proxy so that it only forwarded data to one endpoint. You can also run MITMProxy in transparent proxy mode. This can be useful when trying to debug Integration Broker issues.
To start MITMProxy as a transparent proxy, we simply launch the mitmweb executable.
Powershell
cd 'C:\Program Files\mitmproxy\bin'
.\mitmweb
Configure Integration Broker Proxy
To capture IB traffic with MITMProxy, we need to update the integrationGateway.properties file to route traffic through a proxy. Edit the the ig.proxy* lines to point to our MITMProxy instance.
ig.proxyHost=mitmproxyserver.psadmin.io
ig.proxyPort=8080
You need to restart the web server after making these changes.
Test IB Node
To test our proxy connection, create a new node under “PeopleTools > Integration Broker > Integration Setup > Node Definitions”.
- Name:
GETTEST. - Description:
Test GET Request - Node Type:
External - Default User ID:
PS - Connector ID:
HTTPTARGET - HTTPPROPERTY – Method:
GET - PRIMARYURL:
http://httpbin.org/get
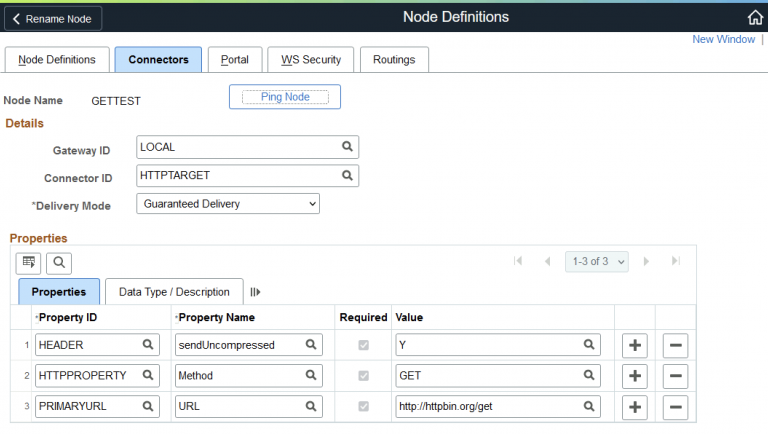
You can save the Node after adding those minimal settings. The node will make a GET HTTP request to a simple REST end point. We are using HTTP instead of HTTPS for now.
Click “Ping Node” and wait for a response. Once the ping is done, you can opent the MITMProxy UI and look at the transaction. There should be one row for our Ping test. While there isn’t much data for this test, we have MITMProxy hooked up to the IB and it’s ready for you to start using.
HTTPS
For our tests so far, we have been using HTTP endpoints. Your IB and Elasticsearch should have HTTPS in place, so to add MITMProxy to the mix requires a few extra steps. We need to trust the MITMProxy certificate so that our application doesn’t reject the HTTPS connection due to trust issues.
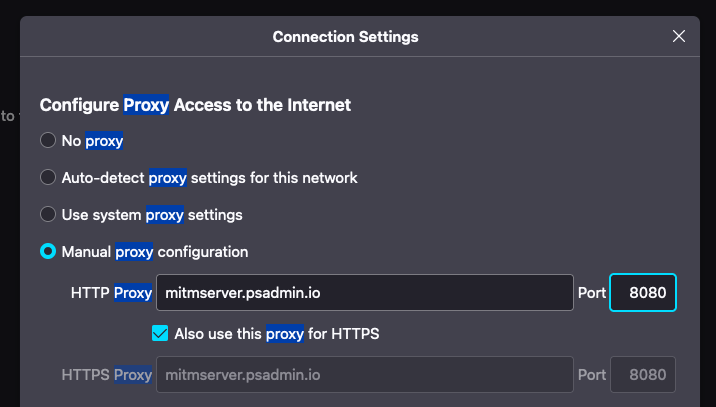
When MITMProxy is started, it also runs a simple web page that can be viewed if your browser is configured to route traffic through MITMProxy. For Firefox, you can enable the Proxy under Settings > Network Settings > Settings > Manual Proxy Configuration. Then enter your MITMProxy server and port 8080. Your browser will now route all traffic through MITMProxy.
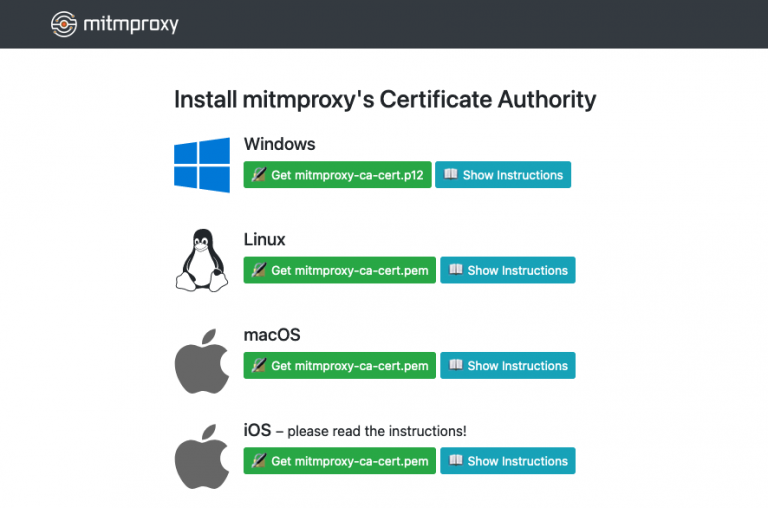
Once your browser is using MITMProxy, you can go to the page http://mitm.it. You will be shown a webpage where you can download the MITMProxy certificates. We need to load this certificate into pskey on our web servers. Download the Linux certificate even if you are on Windows (mitmproxy-ca-cert.pem) since it is in the correct format for pskey. Open the certificate and copy/paste the content onto your web server. I saved my file to /tmp/mitm.pem (or c:\temp\mitm.pem for Windows).
On your web server, use the keytool tool included with Java to import and trust the MITMProxy cert into pskey.
Bash
export domain=WEBSERVER01
keytool -importcert -alias mitmproxy -storepass password -keystore $PS_CFG_HOME/webserv/$domain/piaconfig/keystore/pskey -trustcacerts -file /tmp/mitm.pem

Owner: O=mitmproxy, CN=mitmproxy
Issuer: O=mitmproxy, CN=mitmproxy
...

Trust this certificate? [no]:  yes
Certificate was added to keystore
Powershell
$domain="WEBSERVER01"
keytool -importcert -alias mitmproxy -storepass password -keystore $env:PS_CFG_HOME\webserv\$domain\piaconfig\keystore\pskey -trustcacerts -file c:\temp\mitm.pem

Owner: O=mitmproxy, CN=mitmproxy
Issuer: O=mitmproxy, CN=mitmproxy
...

Trust this certificate? [no]:  yes
Certificate was added to keystore
HTTPS Node Test
Open the GETTEST node definition and update the URL to use https instead of http. Click “Ping Node” to retest with HTTPS.
“Server TLS handshake failed. Certificate verify failed: IP address mismatch”
You may receive an IB error when testing the HTTPS URLs. This can be expected with HTTPS. Many sites are improving their HTTPS support with Certificate Pinning, which helps prevent against “man in the middle” (MITM) attacks. Depending on the integration you are debugging, you may be able to work with HTTPS, or you may have to revert to HTTP for initial integration debugging before adding HTTPS back into the mix.
Application Server
You can also add MITMProxy to the application server configuration. In the psappsrv.cfg file there are two Proxy config lines used by the Java layer that runs inside the application server.
Proxy Host=mitmserver.psadmin.io
Proxy Port=8080
You will need to reconfigure the application server after updating these values.