Build a PeopleSoft Image – On Your Laptop with Vagabond
YouTube player

You can run PeopleSoft Images on your laptop using three tools that work seamlessly together: VirtualBox, Vagrant, and Vagabond.

  • VirtualBox is virtualization software to run a VM on your laptop (any Intel-based laptop, not Apple Silicon-based Macs)
  • Vagrant is a tool to interact with VirtualBox that can automate VM builds
  • Vagabond is an open source tool that delivers automation to build a PeopleSoft Image.

Download and install VirtualBox and Vagrant on your laptop.

Next, you will need to download Vagabond from GitHub. The preferred way to to download is via git (you can install Git but it’s optional). Without git, you can click on the latest Release and download the zip file.

cd ~/Downloads
# unzip ps-vagabond*.zip if downloading from the Releases
git clone https://github.com/psadmin-io/ps-vagabond.git
cd ps-vagabond

There are two configuration files we need to run Vagabond:

  • config.rb
  • psft_customizations.yaml

Vagabond delivers example versions of each of these files and we can copy the .example files.

cd config
copy-item ./psft_customizations.yaml.example psft_customizations.yaml
copy-item ./config.rb.example config.rb
cd ..

You only need to modify the psft_customizations.yaml file if you are building a Finance or Interaction Hub image. You need to modify the default user to be VP1 instead of PS.

The config.rb file you must modify to make Vagabond work. It needs two pieces of information: your My Oracle Support Credentials, and a Patch ID for the PeopleSoft Image.

MOS_USERNAME="dan@psadmin.io"
MOS_PASSWORD="password"

PATCH_ID="34775556"

Now you are ready to build the PeopleSoft Image.

vagrant up

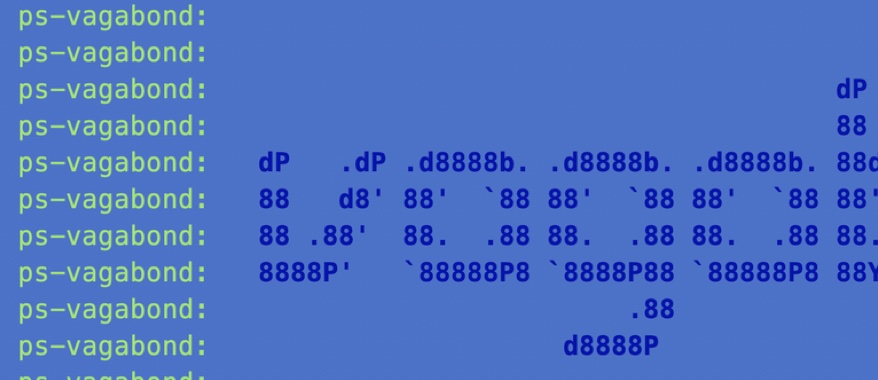
You will see output from Vagrant displaying the different tasks it handles setting up the VM. Vagrant will download a base Oracle Linux 8 VM, create a new VirtualBox VM, configure the networking, and start provisioning. Provisioning is the set of scripts that Vagabond provides to automate the download and building of PeopleSoft Images. Below is a (simplified) version of the output you will see as Vagabond runs.

Bringing machine 'ps-vagabond' up with 'virtualbox' provider...
==> ps-vagabond: Importing base box 'generic/oracle8'...
==> ps-vagabond: Setting the name of the VM: 34775556
==> ps-vagabond: Configuring and enabling network interfaces...
==> ps-vagabond: Mounting shared folders...
    ps-vagabond: /vagrant => /Users/dan/Downloads/ps-vagabond
    ps-vagabond: /media/sf_34775556 => /Users/dan/Downloads/ps-vagabond/dpks/download
==> ps-vagabond: Running provisioner: networking_setup (shell)...
    ps-vagabond:  ☆  INFO: 
    ps-vagabond:  ☆  INFO: 
    ps-vagabond:  ☆  INFO: ===> Add '192.168.56.34 psvagabond psvagabond.psadmin.local' to your hosts file
    ps-vagabond:  ☆  INFO: 
    ps-vagabond:  ☆  INFO: 
==> ps-vagabond: Running provisioner: storage (shell)...
==> ps-vagabond: Running provisioner: bootstrap-lnx (shell)...
    ps-vagabond: 
    ps-vagabond: 
    ps-vagabond:                                       dP                               dP 
    ps-vagabond:                                       88                               88 
    ps-vagabond:   dP   .dP .d8888b. .d8888b. .d8888b. 88d888b. .d8888b. 88d888b. .d888b88 
    ps-vagabond:   88   d8' 88'  `88 88'  `88 88'  `88 88'  `88 88'  `88 88'  `88 88'  `88 
    ps-vagabond:   88 .88'  88.  .88 88.  .88 88.  .88 88.  .88 88.  .88 88    88 88.  .88 
    ps-vagabond:   8888P'   `88888P8 `8888P88 `88888P8 88Y8888' `88888P' dP    dP `88888P8 
    ps-vagabond:                          .88 
    ps-vagabond:                      d8888P 
    ps-vagabond: 
    ps-vagabond: 
    ps-vagabond:  ☆  INFO: Updating installed packages
    ps-vagabond:  ☆  INFO: Installing additional packages
    ps-vagabond:  ☆  INFO: Disable SELinux for PeopleSoft Images
    ps-vagabond:  ☆  INFO: Downloading patch files
    ps-vagabond:  ☆  INFO: Unpacking DPK setup scripts
    ps-vagabond:  ☆  INFO: Executing Pre setup script
    ps-vagabond:  ☆  INFO: Executing DPK setup script
    ps-vagabond:  ☆  INFO: Install psadmin_plus
    ps-vagabond:  ☆  INFO: Open Firewall Ports
    ps-vagabond: 
    ps-vagabond:  TASK                         DURATION
    ps-vagabond: ========================================
    ps-vagabond:  install_psadmin_plus         00:00:01
    ps-vagabond:  download_patch_files         00:13:36
    ps-vagabond:  unpack_setup_scripts         00:00:41
    ps-vagabond:  execute_pre_setup            00:00:00
    ps-vagabond:  install_additional_packages  00:01:29
    ps-vagabond:  update_packages              00:03:40
    ps-vagabond:  open_firewall_ports          00:00:02
    ps-vagabond:  execute_psft_dpk_setup       01:00:56
    ps-vagabond:  generate_response_file       00:00:00
    ps-vagabond:  disable_selinux              00:00:00
    ps-vagabond: ========================================
    ps-vagabond:  TOTAL TIME:                  01:20:25
    ps-vagabond: 
==> ps-vagabond: Running provisioner: cache-lnx (shell)...
    ps-vagabond:  ☆  INFO: Copying Manifests
    ps-vagabond:  ☆  INFO: Fix DPK App Engine Bug
    ps-vagabond:  ☆  INFO: Pre-load Application Cache
    ps-vagabond: 
    ps-vagabond:  TASK                         DURATION
    ps-vagabond: ========================================
    ps-vagabond:  fix_dpk_bug                  00:00:02
    ps-vagabond:  load_cache                   00:21:03
    ps-vagabond:  download_manifests           00:00:00
    ps-vagabond: ========================================
    ps-vagabond:  TOTAL TIME:                  00:21:05
    ps-vagabond: 

To access the PeopleSoft Image from a browser, you first need to add a hosts entry. In the output, you’ll see the text you need to add to the file.

For Windows, the file is located at C:\Windows\System32\drivers\etc\hosts, and Mac/Linux the file is /etc/hosts. From our example above, you would add this line to the file:

192.168.56.34 psvagabond psvagabond.psadmin.local

Then you can access the PeopleSoft Image at http://psvagabond.psadmin.local:8000/ps/signon.html

A few tips for working with Vagrant VMs. It’s very easy to take a snapshot as a backup of the VM. I always take a snapshot right after building the image.

vagrant snapshot save build

If you need to stop or start the VM, use these commands:

vagrant halt        # stop the VM
vagrant up          # start the VM
vagrant suspend     # pause the VM
vagrant resume      # unpause the VM

You can also SSH into the VM if you want to access the server:

vagrant ssh

#294 – That is fine

The PeopleSoft Administrator Podcast hosted by Dan Iverson and Kyle Benson

This week on the podcast, Dan gives an update on his Hyper-V work with Vagabond and shares a funny log line he found, and Kyle shares some thoughts on making Hiera and eYAML more secure for PeopleTools DPK.

Show Notes

#132 – Works Like Magic


This week on the podcast, Dan shares a Vagrant plugin to help with Root Certificates and a change to WebLogic certifications with 8.56. Then Kyle and Dan discuss running VERSION and how to deal with bad cache.

Show Notes

#126 – Elasticsearch Backups


This week on the podcast, Dan and Kyle discuss options and considerations for backing up Elasticsearch. Kyle also shares a bug with the PIA startup scripts built by the DPK and Dan makes Vagrant work with a Web Filter.

Show Notes

#80 – Apply Your CPU Patches!

This week, Kyle and Dan talk about using Vagrant snapshots with Vagabond, strategies for managing psft_customizations.yaml files and demonstrating Fluid to end users. Dan shares a story of how an unpatched WebLogic server can leave your PeopleSoft application vulnerable to hackers.

Show Notes

  • Securing the Oracle Listener @ 1:30
  • Vagabond and Vagrant Snapshots @ 2:00
  • Vault and Hiera @ 7:45
  • Remote Desktop Spanning @ 14:00
  • Why You Apply CPU Patches – A Story @ 16:30
  • CPU Patching Wishlist @ 23:30
  • DPK and Middleware-only @ 33:15
  • psft_customizations.yaml strategies @ 39:00
  • Upgrading Interaction Hub @ 50:00
  • Demoing Fluid @ 57:00

#52 – Vagabond and Rundeck w/ JR Bing

This week on the podcast we celebrate 1 year of podcasting with JR Bing. JR talked with us about his Vagabond project for managing PeopleSoft Images, how he uses RunDeck to simplify daily administration tasks, being a Mac user and using GitHub to manage projects and code.

We want to make this podcast part of the community discussion on PeopleSoft administration. If you have comments, feedback, or topics you’d like us to talk about, we want to hear from you! You can email us at podcast@psadmin.io, tweet us at @psa_io, or use the Twitter hashtag #psadminpodcast.

You can listen to the podcast here on psadmin.io or subscribe with your favorite podcast player using the URL below, or subscribe in iTunes.

Podcast RSS Feed

Show Notes

#49 – Chocolatey

This week on the podcast, Kyle and Dan discover why their app server generates unnecessary .tracesql files. Dan talks about the Chocolatey package manager for Windows and the SES Namespace feature, and Kyle has an update on platform changes with PeopleTools.

We want to make this podcast part of the community discussion on PeopleSoft administration. If you have comments, feedback, or topics you’d like us to talk about, we want to hear from you! You can email us at podcast@psadmin.io, tweet us at @psa_io, or use the Twitter hashtag #psadminpodcast.

You can listen to the podcast here on psadmin.io or subscribe with your favorite podcast player using the URL below, or subscribe in iTunes.

Podcast RSS Feed

Show Notes

Introduction to Vagrant


As an admin, creating and testing new software with virtual machines has made our jobs easier. Using VirtualBox and your computer, we can set up a VM and test anything. With the PeopleSoft Images, we can quickly set up a new demo environment and test new features.

While setting up new virtual machines is easy, it does require many steps like downloading the base image, setting up users, installing software and more. Getting the same base virtual machine every time requires attention to detail and doing the same steps, over and over.

Vagrant

Vagrant is a tool that creates the same virtual machine for you every time. You can use Vagrant to create your own VM, or use someone elses VM. Vagrant also simplifies the creation and management of virtual machines on your computer. Here is an example of how to use Vagrant to start a new Puppet Enterprise server on Centos 6:

vagrant init puppetlabs/centos-6.6-64-puppet
vagrant up

That’s it!

The first command tells Vagrant that we want to create an image from the template puppetlabs/centos-6.6-64-puppet from Puppet Labs. The second command tell Vagrant to start the VM. The vagrant up command will download the base virtual machine file from Vagrant’s Atlas site, start the image in VirtualBox, and do any server configuration once the VM starts.

Providers

Vagrant is a front end to VirtualBox, but it will also work with VMWare, Hyper-V, Amazon Web Services, Docker and more. Using different providers is pretty easy (AWS takes a little more setup), and Vagrant handles each providers system for you. We only worry about our Vagrant configuration, not the platform our virtual machines are running on. For this post, and others, we’ll stick to VirtualBox since it’s a free option and works on multiple operating systems.

Atlas

Atlas is service from Vagrant were you can find virtual machine templates created by community members. On Atlas you can search for an OS or software and find virtual machines that people have created. Some of the popular virtual machines are:

  • hashicorp/precise64 – Ubuntu 12.04 TLS 64-bit
  • centos/7 – Centos 7 64-bit
  • puppetlabs/centos-6.6-64-puppet – Puppet Enterprise on Centos 6.6.64
  • mwrock/Windows2012R2 – Windows 2012 R2 (Evaluation License – 180 days)

Install Vagrant

The first step to using Vagrant is to install the latest build. Go to the Vagrant Downloads page and grab the installer for your platform. Download the installer and run it.

Next we need VirtualBox installed. If you already have it installed, take this time to upgrade to the lastest version. You can download the latest version of VirtualBox here.

Create a Virtual Machine


Now we can use Vagrant to create a new virtual machine. Open a command prompt and navigate to the folder where you want to store the virtual machine.

cd ~/VirtualBox VMs/

Next, create a new folder to hold our first virtual machine:

mkdir elastic_test
cd elastic_test

We’ll use the centos/7 base image for our test.

vagrant init centos/7

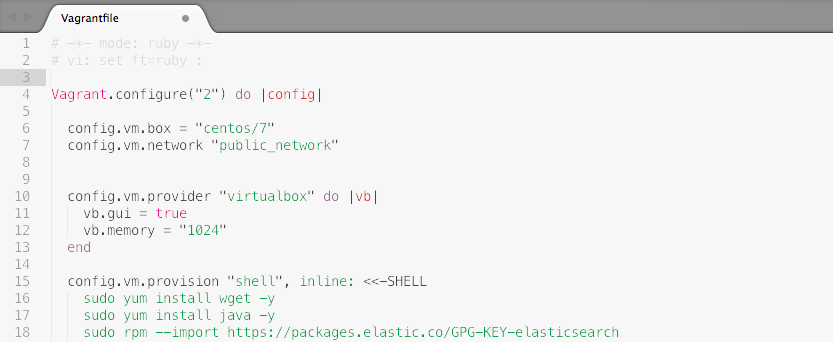
The init command will create a new file in the folder: Vagrantfile. The Vagrantfile tell Vagrant how to configure the virtual machine. We use this file to give the VM a name, how much memory to use, what networking type, and more. We’ll come back to file later.

The next step is to start the virtual machine.

vagrant up

The up command does a few things:

  1. Checks to see if you have VM on the system
  2. If not, download the image from Atlas
  3. Start the VM in VirtualBox (headless VM)
  4. Configure port forwarding and connect to the VM with SSH
  5. Set up the Vagrant share
  6. Run any provisioning scripts in the VM

That one command handles a lot of work for us. Let’s look at some of the key steps.

vagrant Shared Folder

By default, Vagrant will share the folder where you create the virtual machine as /vagrant inside the VM. This share is convenient but is also important for Vagrant provisioning. Script inside the folder, in our case elastic_test, are accessible in the VM. We can configure different folders to share as well. In Vagrantfile, uncomment and modify `

config.vm.synced_folder "../data", "/vagrant_data" 

to point to the folder on your host you want to share. The next time you start the virtual machine the share will be configured.

Vagrant ssh

For Linux virtual machines, SSH is configured when the VM is created. To access the virtual machine via SSH, use

vagrant ssh

You can use traditional ssh commands, but using vagrant ssh will use pre-configured SSH keys and log you into the VM.

Port Forwarding and Networking

By default, Vagrant will set up the virtual machine to use a private IP address. This means you can only access the VM from the host machine. When the VM is created, port 2222 is configured to forward requests to port 22 (for SSH). vagrant ssh knows this, so it connects to localhost:2222 when you connect to the VM. To change the networking configuration so anyone on your network can access the VM, update this line in Vagrantfile:

config.vm.network "public_network"

Vagrant will create a second network adapter that grabs a public IP from your networks DHCP server.

Memory and More

The last change we’ll make to the virtual machine is setting the memory and enabling the GUI. When Vagrant starts a Linux VM, it starts a Headless session (no GUI window). If you are comfortable with SSH and command lines this won’t be an issue. If you want to see the VM window in VirtualBox, we’ll update the Vagrantfile to show the GUI.

  config.vm.provider "virtualbox" do |vb|
    # Display the VirtualBox GUI when booting the machine
    vb.gui = true

    # Customize the amount of memory on the VM:
    vb.memory = "1024"
  end

For Windows virtual machines, except Windows Server Core/Nano, the GUI will display by default.

Restart, Shutdown and Delete VM’s

To restart or stop a virtual machine created by Vagrant, we use these commands:

  • Restart: vagrant reload
  • Shutdown: vagrant halt

If you are done with the virtual machine and want it removed from your system, use:

vagrant destroy

Provisioning


Those are the basics to using Vagrant. Once you spend a few minutes working with Vagrant, it is hard to go back to creating virtual machines by hand. But quickly creating VM’s is only one benefit of Vagrant. Vagrant has an excellent provisioning mechanism, which means you can create the same VM every time.

Let’s install Elasticsearch in our virtual machine. In the Vagrantfile, find the section config.vm.provision and update it:

config.vm.provision "shell", inline: <<-SHELL
  sudo yum install wget -y
  sudo yum install java -y
  sudo rpm --import https://packages.elastic.co/GPG-KEY-elasticsearch
  sudo wget https://gist.githubusercontent.com/iversond/a5d8985657a9a6c4332dd9a776bd195a/raw/88d3b1b3eb14a4f638ce07473550d108287e4e7e/yum-elasticsearch.repo -O /etc/yum.repos.d/elasticsearch.repo
  sudo yum install elasticsearch -y
  sudo systemctl daemon-reload
  sudo systemctl enable elasticsearch.service
  sudo systemctl start elasticsearch.service
SHELL

Vagrant will run the provisioning script the first time a virtual machine is created, but we can re-run provisioning at any time. Run the command:

vagrant provision

After the provisioning scripts run, log into the virtual machine and check if Elasticsearch is running.

vagrant SSH
curl -X GET http://localhost:9200/

If Elasticsearch installed correctly, you’ll see a response like this:

{
  "name" : "Talia Josephine Wagner",
  "cluster_name" : "elasticsearch",
  "cluster_uuid" : "x1W8bOqBTEy8rdR0P6VUwg",
  "version" : {
    "number" : "2.4.1",
    "build_hash" : "c67dc32e24162035d18d6fe1e952c4cbcbe79d16",
    "build_timestamp" : "2016-09-27T18:57:55Z",
    "build_snapshot" : false,
    "lucene_version" : "5.5.2"
  },
  "tagline" : "You Know, for Search"
}

Disposable and Consistent VM’s

Let’s say we messed up our VM by accidentally running a bad command, or updated some software that messed up our configuration. For example:

rm -rf / --no-preserve-root

Now our virtual machine is broken. Let’s use Vagrant to delete and recreate our VM. We should have the same VM we had before we “accidentally” ran that command.

First step is to shutdown and remove the virtual machine:

vagrant halt
vagrant destroy

If you look at the directory where Vagrant stored the virtual machine, you’ll see the Vagrantfile still exists, but the virtual machine files are gone. Now let’s recreate our virtual machine:

vagrant up

SSH into our rebuilt VM and test Elasticsearch:

vagrant ssh
curl -X GET http://localhost:9200/

That was easy 🙂 We build, broke, removed and rebuilt a virtual machine with a few commands. If you want to build more complex machines (think DPKs), Vagrant supports Puppet, Ansible and more for provisioning.